Remove Scratches, Scuffs, and Tape Marks from Old Photos
The Restore tool lifts scratches, scuffs, dust, and tape marks from an old photo in about ten seconds, without smoothing away the detail underneath.
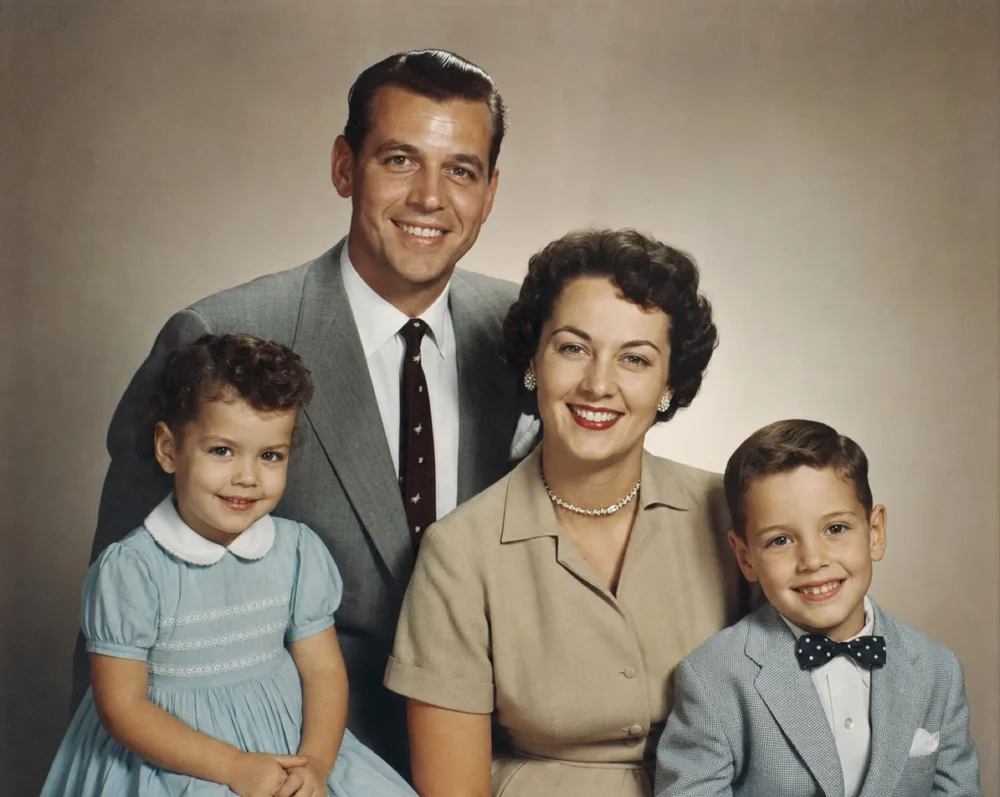
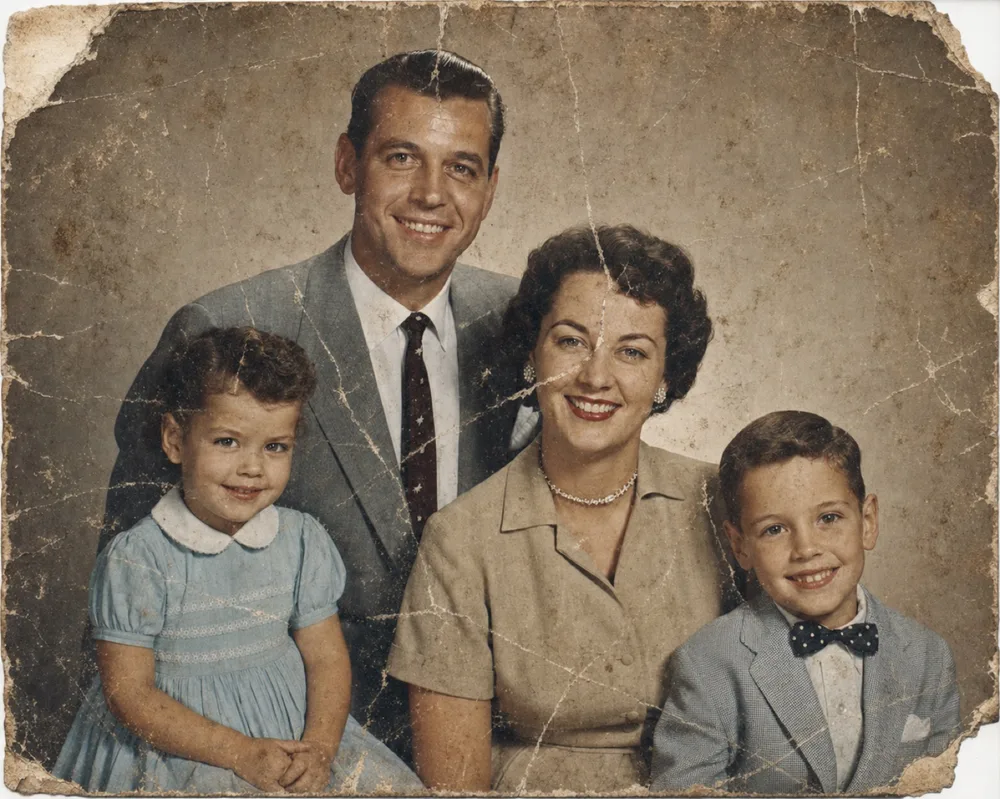
Drag to compare before & after
The quickest way to remove scratches from a photo is to let AI treat the scratch as missing information and rebuild only that thin line, rather than editing the whole picture. That's what OldtoLife's Restore tool does: point your phone at a scratched print, or upload a scan, and within about ten seconds the scratches, scuffs, dust flecks, and tape marks are gone while the face, clothing, and background stay exactly as they were.
Surface damage like this is different from a torn or missing section of a photo, and it's different from general fading too — which is why this page focuses specifically on scratches, scuffs, dust, and tape residue: the kind of damage that sits on top of an image rather than removing part of it. If your photo is also faded or has a piece torn away entirely, Restore still helps with the surface marks, and you can pair it with Recreate for anything that's actually missing.
Where These Scratches and Marks Actually Come From
Most scratches on old prints happen long after the shutter clicked. A photo pulled in and out of a plastic sleeve picks up fine hairline marks from the friction. One stored loose in a shoebox rubs against its neighbors every time the box is moved. A print pressed under glass in a frame can pick up scuffs from cleaning, humidity, or the glass shifting slightly over decades.
Tape is another common culprit. Photos mounted in scrapbooks or hung on a wall or fridge with tape often show a ring of residue, discoloration, or a torn edge once the adhesive fails or someone removes it. Dust and lint work differently — they settle into a photo's surface over years in storage, and on faded or matte prints they can look almost like part of the image until you know what to look for.
- Hairline scratches from sliding photos in and out of albums or sleeves
- Scuff marks where a print rubbed against picture glass
- Tape residue and outline stains from scrapbook mounting
- Fine dust and lint embedded in the photo's surface
- Fingerprint smudges left from years of handling
How the Restore Tool Removes Scratches Without Blurring the Photo
Older photo-editing tricks for scratches usually meant blurring or smoothing the whole image until the mark blended in, which softened faces and fine detail right along with it. OldtoLife's Restore tool works differently: it's trained to recognize the visual signature of a scratch — a thin, discontinuous line that interrupts an otherwise consistent texture — and treats only those pixels as missing.
Once the AI isolates the damage, it rebuilds that narrow strip using the surrounding color, grain, and texture as a reference, the same way a skilled retoucher would sample nearby areas rather than guess. Everything outside the scratch — the eyes, the fabric folds, the background — is left alone. The whole process runs on our servers and takes about ten seconds per photo.
You can see exactly what changed with the before/after slider: drag it across the result and the original scratched version is right there for comparison, so nothing about the repair is a surprise.
Scratches, Tape Marks, and Dust vs. Torn or Missing Pieces
Not every mark on an old photo is the same kind of damage, and it's worth knowing the difference before you restore one. A scratch, scuff, or dust speck sits on top of the image — the information underneath is still there, just obscured or interrupted, which is exactly the situation the Restore tool is built to fix in one pass.
A torn photo is different: part of the image itself is physically gone, and there's nothing underneath to recover — it has to be rebuilt from context, with faces, clothing, and background patterns extrapolated from what remains. For that kind of damage, OldtoLife's Recreate tool is the better fit. If your photo has both — a scratched surface and a corner missing entirely — running Restore first for the scratches and Recreate for the missing piece gets you further than either tool alone.
Getting a Clean Photo or Scan Before You Restore It
The Restore tool works from whatever image you give it, so a few minutes of care before you tap the tool pays off. If you're photographing a print with your phone, use soft, indirect daylight rather than a flash — direct flash creates glare and hotspots that can look like additional damage to the algorithm. Lay the photo flat on a plain, non-reflective surface and shoot straight on, not at an angle, so the image doesn't warp.
If the photo is still in a frame, take it out before photographing it if you can; shooting through glass adds reflections and a second layer of surface artifacts that make the scratch harder to isolate. A flatbed scanner works well too, if you have access to one — either method gives the AI a clean, evenly lit image to work from.
- Use soft, indirect light — skip the flash
- Lay the print flat on a plain, non-glossy surface
- Shoot straight on, not at an angle
- Remove the photo from its frame before photographing, if possible
- A flatbed scanner works just as well as a phone camera
What You Get Back
The result is a high-resolution version of your photo with the scratches, scuffs, dust, and tape marks lifted, while the people, tones, and likeness stay true to the original. Nothing about the photo is redrawn or reimagined — the Restore tool repairs what's damaged and leaves what's already good exactly as it was.
You can try the Restore tool for free to see the result on your own photo. Premium removes the daily limit and unlocks full-HD downloads for the sharpest possible copy, useful if you're planning to print the photo or preserve it long-term. Either way, your photo is processed only to produce the result and isn't used to train unrelated models.
How to do it, step by step
- 1
Open the Restore tool
From the OldtoLife home screen, tap Restore to start a new scratch and surface-damage repair.
- 2
Add your scratched photo
Snap a photo of the print in good, even light, or import an existing scan or photo from your gallery.
- 3
Let the AI lift the damage
The Restore tool isolates scratches, scuffs, dust, and tape marks and rebuilds just those areas — about ten seconds per photo.
- 4
Compare with the before/after slider
Drag the slider across the result to see exactly what changed against the original scratched version.
- 5
Save or share the result
Save the high-resolution photo to your gallery or share it directly; full-HD downloads are included with Premium.
Remove Scratches, Scuffs, and Tape Marks from Old Photos — FAQ
Will removing scratches make my photo look artificial or over-smoothed?
No. The Restore tool only rebuilds the thin scratch itself, using the surrounding grain and texture as a reference, so the rest of the photo — faces, fabric, background — keeps its original detail instead of being smoothed over.
Can it also remove tape marks, dust, and fingerprint smudges?
Yes. The tool treats tape residue, dust specks, and smudges the same way it treats scratches — as surface marks sitting on top of the image — and removes all of them in the same pass.
What if the scratch actually tore a piece of the photo away?
If part of the image is physically missing rather than just scratched or scuffed, the Recreate tool is built for that — it rebuilds larger missing areas using the surrounding context. Restore is for damage that sits on the surface.
Do I need to scan the photo first, or can I use my phone camera?
A phone photo works fine as long as it's taken in even, indirect light without glare. A flatbed scan also works well if you have access to one.
How long does scratch removal take?
About ten seconds per photo. The processing happens on our servers, and you'll see the before/after slider as soon as it's done.
Is my photo kept private?
Your photo is uploaded only to generate the restored result. It isn't sold and isn't used to train unrelated models, and it's kept only briefly.
Still have a question? Email us
Related tools & guides
Recreate a Severely Damaged Photo Portrait
When a portrait is torn or stained so badly that a whole section of a face is gone, Recreate rebuilds what's missing using AI trained on human facial structure — aiming for a natural likeness, not just a patched-over hole.
Old Photo Restoration: A Guide to All Six OldtoLife Tools
Old photo restoration doesn't have to mean guessing which filter fixes what — this guide walks through OldtoLife's six tools and how to combine them for the best result.
How to Remove Scratches and Creases from Photos
Scratches and creases can be smoothed away without touching the original print, whether you retouch by hand or let AI reconstruct the damaged area for you.
Common Types of Photo Damage (and What Causes Them)
Old photos don't fall apart randomly — they fail in a handful of recognizable ways, and knowing which one you're looking at makes fixing it a lot less guesswork.
How to Restore Torn Photographs
A tear doesn't have to mean a photo is gone for good. Handle the print carefully, capture it well, and digital repair can close the gap so the tear disappears.
Restore Vintage Portraits from Your Phone
Bring back the sharp detail and true tones of a studio portrait without touching the fragile original print underneath.
Your memories deserve to be seen clearly
Download OldtoLife and restore your first photo in seconds. Every tool is free to try — no account needed.