How to Remove Scratches and Creases from Photos
Scratches and creases can be smoothed away without touching the original print, whether you retouch by hand or let AI reconstruct the damaged area for you.
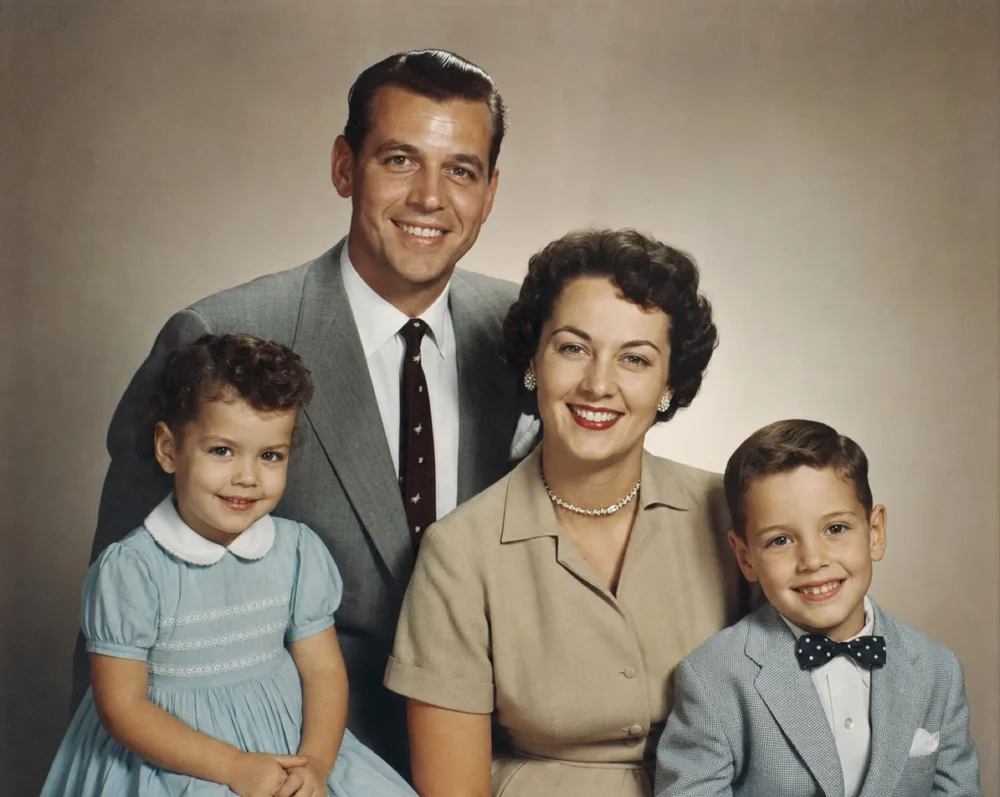
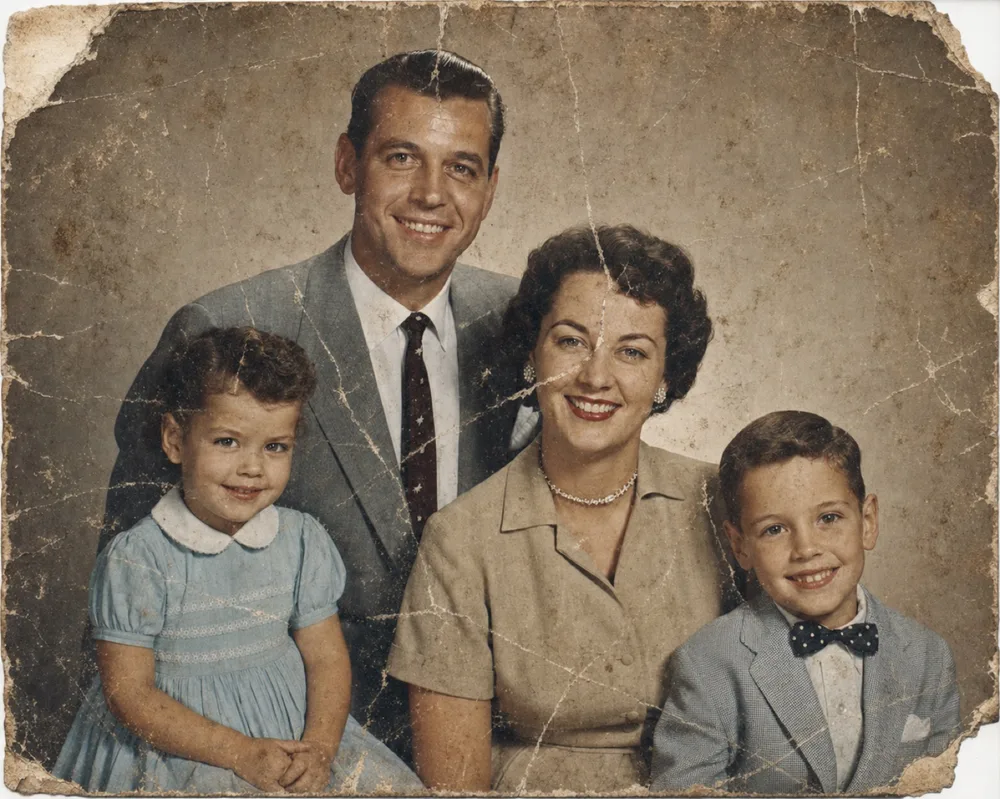
Key takeaways
- Scratches are surface scrapes; creases are cracked folds that erase both texture and tone, so removing them well means rebuilding detail, not just smoothing a line.
- A clean, evenly lit scan or photo of the original always gives a better result than a rushed one, regardless of which restoration method you use.
- AI restoration like OldtoLife's Restore tool reconstructs scratches, creases, and tears in about 10 seconds; manual retouching can take much longer and requires real editing skill.
- If a crease also tore away part of the photo, that's missing content rather than surface damage — a rebuild tool like Recreate handles that separately from Restore.
You can remove scratches and creases from a photo either by retouching it by hand in photo-editing software or by running a scan of it through an AI restoration tool that reconstructs the damaged area automatically. For most people, the AI route produces a cleaner result in far less time, especially when the damage includes both a visible line and a patch of lost detail underneath it.
This guide walks through why photos crease and scratch in the first place, how to get a good enough digital copy for either method to work well, and what to do when the damage is deep, layered, or combined with fading or torn corners. The goal is a restored photo that still looks like a photograph, not a smoothed-over illustration.
What Causes Scratches and Creases in Old Photos?
Scratches are almost always physical abrasion: the photo's surface, or emulsion, gets scraped by something harder than it — a fingernail, a pen tip, grit trapped in an album sleeve, or one photo sliding against another in a shoebox for decades. The scrape lifts a thin layer of the image, leaving a pale or dark line depending on how deep it goes.
Creases are different. A crease starts as a fold, usually from being carried in a wallet, mailed in an envelope, or stacked under heavier objects. The fold cracks the emulsion along the line, and over time that crack can lighten, darken, or flake away entirely, which is why creases often look worse than scratches even when the original fold was minor.
Both kinds of damage get worse the longer a photo sits creased or scratched, because dust and oils settle into the break and humidity swings make brittle paper flex along the same weak line every time it's handled.
- Repeated handling and stacking in boxes or albums
- Being folded to fit a wallet, envelope, or frame
- Photos sliding against each other without sleeves
- Humidity and temperature swings flexing the paper
- Direct sunlight drying out and cracking the emulsion
Manual Retouching vs. AI Restoration: Which Should You Use?
Manual retouching, using tools like the clone stamp or healing brush in an image editor, works reasonably well on a single short scratch against a plain background — a clear sky, for instance. It gets much harder over a face, patterned clothing, or a crease that crosses several different textures, because you're manually copying nearby pixels and blending them by eye, and it's easy to leave a smeared or repetitive patch that looks worse under close inspection.
Sending the photo to a professional restorer gets you a skilled human eye, but it typically costs money per photo and takes days to weeks of turnaround, which adds up fast if you're working through a whole box of family pictures.
AI restoration sits in between: it's trained to recognize the difference between a scratch or crease and the actual photo content, then rebuilds the damaged pixels based on the surrounding detail, in seconds rather than hours. OldtoLife's Restore tool is built specifically for this kind of physical damage — scratches, creases, tears, tape marks, and general fading — so you don't need editing skill or a paid service to get a usable result.
How to Photograph or Scan a Damaged Photo Before Restoring It
Whichever method you use, the result is only as good as the digital copy you start from. A blurry, glare-covered, or unevenly lit scan gives any tool, human or AI, less to work with, so it's worth a few extra minutes at this step.
If you're using a flatbed scanner, 300–600 dpi is plenty of detail without producing an unwieldy file, and it's worth pressing the photo flat under the scanner lid for a few seconds if it has any curl. If you're photographing it with a phone, use soft, even daylight rather than the flash — a flash bounces off the crease lines and shadows and can exaggerate the damage instead of showing it clearly.
Capture the full photo including its edges and any border, since torn or missing corners are relevant damage too, and check that no glare or reflection is sitting across the exact area you're trying to fix.
- Flatten the photo under a heavy book overnight if it's curled
- Use diffuse daylight or an overhead lamp, not direct flash
- Keep the camera or scanner lid parallel to the photo to avoid distortion
- Include the full frame, edges, and corners in the shot
Removing Deep Creases, Folds, and Multiple Layers of Damage
A shallow crease is mostly a visible line — the underlying image is intact and just needs the line smoothed and toned to match. A deep crease is harder: the fold has actually cracked away part of the emulsion, so there's a thin strip where the original color and detail are simply gone, not just obscured. Good restoration software has to infer what belonged there from the pixels on either side, not just blur the line.
Photos often carry more than one kind of damage at once — a crease across the middle, general fading from age, and a scratch near an edge, for example. A tool built only for one kind of problem will leave the others untouched, so it helps to think of restoration as a sequence: Restore to handle the scratches, creases, and tears, then Brighten or Colorize afterward if the photo is also faded or black-and-white.
Corners are usually the worst-hit part of any old photo, since they take the most physical stress from handling and are the first place paper tears or breaks off entirely. When a crease has actually removed a corner or a chunk of the image rather than just marking it, that's missing content rather than surface damage, and OldtoLife's Recreate tool is built specifically to rebuild those larger missing areas.
What to Do After the Scratches Are Gone
Once a photo has been restored, look closely at the areas where the damage was worst, especially faces, hands, and any spot where a crease crossed fine detail. A before-and-after slider is the fastest way to check this, since it lets you compare the exact same crop rather than two separate images side by side.
If the photo still looks flat, dark, or discolored after the scratches and creases are gone, that's a separate pass — Brighten for exposure and Enhance for sharpness and resolution are the next natural steps, since removing physical damage doesn't automatically fix lighting or blur.
Finally, save the restored version at full resolution before sharing or printing it, and keep the original photo stored flat, out of direct light, and away from further handling — restoring the digital copy doesn't repair the physical print, so the same crease can reappear or worsen if the original keeps getting folded the same way.
Step by step
- 1
Capture a clean copy of the original
Scan at 300–600 dpi or photograph the photo flat under even daylight, avoiding flash and glare across the damaged area.
- 2
Open OldtoLife and select Restore
Upload the scan and choose the Restore tool, which is built to handle scratches, creases, tears, and tape marks.
- 3
Let the AI process the photo
The restoration runs on OldtoLife's servers and typically finishes in about 10 seconds.
- 4
Compare the result with the before/after slider
Zoom into faces and any area that had deep creasing to check the rebuilt detail looks natural.
- 5
Save or share the finished photo
Download the high-resolution result and keep the original print stored flat so the same damage doesn't return.