How to Recreate a Damaged Portrait
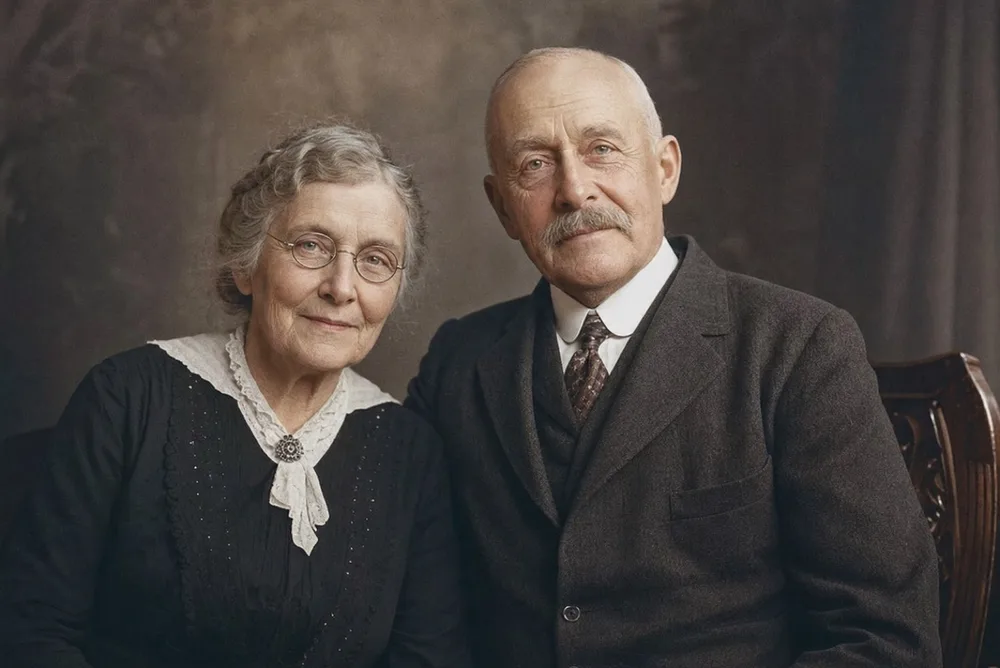
When part of a portrait is torn away, water-damaged, or missing entirely, fixing it means more than cleaning up what's left — it means rebuilding what's gone using reference photos and careful reconstruction.
Key takeaways
- Recreation rebuilds physically missing or erased areas of a portrait; restoration cleans up damage on an image that's still structurally whole — many photos need both.
- Reference photos of the same person (or close relatives) and family recollections of specific features matter more than software or artist skill for a convincing result.
- Manual recreation from a professional artist offers close human control but costs more and takes days to weeks; AI tools like OldtoLife's Recreate infer missing structure in about ten seconds when enough of the original survives.
- Check lighting direction, grain, and period-accurate details (hairstyles, glasses, collars) before treating a recreated portrait as finished.
Recreating a damaged portrait means reconstructing the parts of the image that are physically gone — a torn corner, a face eaten by water or mold, a section blotted out by stain or ink — by inferring what was originally there from surrounding detail, reference photos, and either manual retouching or AI reconstruction. It's a different job than ordinary restoration, which cleans up scratches, creases, and fading on a photo that's still structurally whole.
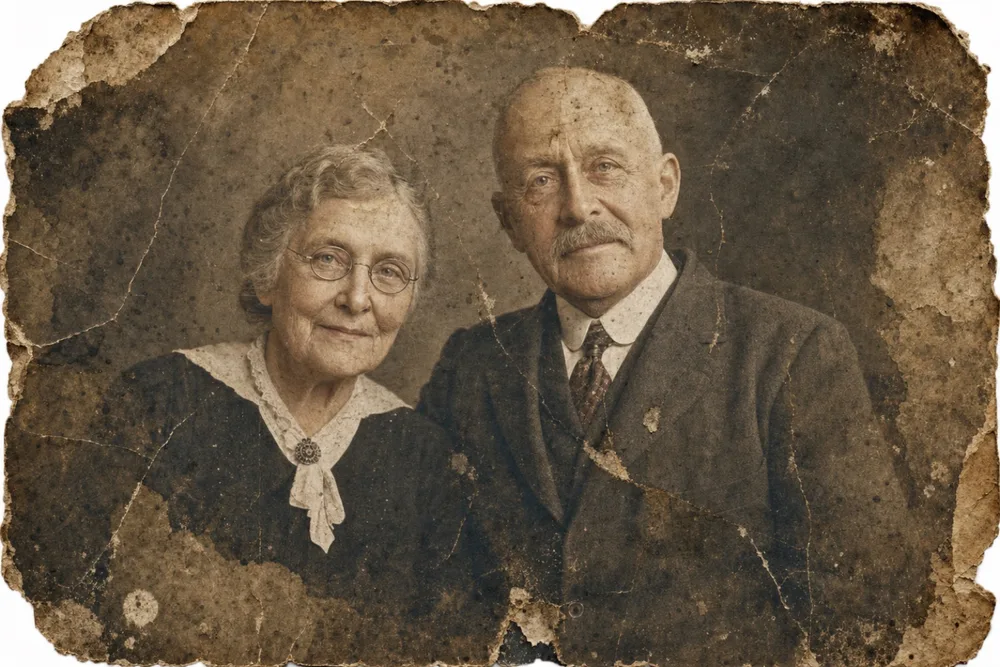
Recreation is what you turn to when standard repair simply has no pixel data to work with: a corner torn clean off, a face dissolved by moisture, a hole where an iron-on patch used to be. This guide covers how to tell whether a photo needs recreation instead of restoration, what to gather before you start, and the practical paths for filling in what's missing — from hiring a portrait artist to using an AI tool like OldtoLife's Recreate — without ending up with a stranger's face where a relative's used to be.
Restoration vs. Recreation: How to Tell Which One You Need
Most damaged photos only need restoration. Scratches, creases, faded color, yellowing, dust spots, and even a fairly deep tear that hasn't removed any actual image content can be repaired because the underlying detail is still technically present — it just needs to be cleaned up, sharpened, or color-corrected. If you can trace the outline of a face, a collar, a background object, even faintly, that's restoration territory.
Recreation starts where restoration runs out of information. If a piece of the photo is physically absent — a corner torn off and lost, an area dissolved by water so only blank paper or a stain remains, ink or mold that has erased the image entirely in one spot — there's no data left to clean up. Something new has to be built in that space based on context: symmetry in a face, the pattern of a shirt, the shape of an ear implied by the other side of the head.
Many old portraits need both at once. A photo might have general fading and scratching across the whole surface (restoration) plus one corner that's missing outright where the face was pinned to a wall for years (recreation). It helps to look at the damage patch by patch rather than deciding on one label for the whole photo.
What to Gather Before You Start
The single biggest factor in a convincing recreation is reference material, not skill or software. Before you touch the damaged photo, look for other pictures of the same person from around the same period — they show you the exact hairline, ear shape, jaw, and any distinguishing features that might be missing from the damaged print. A portrait from five years earlier or later is far more useful than no reference at all.
If no other photo of that person exists, photos of a sibling or parent from a similar age can serve as a rough stand-in for shared family features, though this should be treated as an approximation, not a guarantee of accuracy. Family members who knew the person are also a resource: a parent's memory of "she always had a mole near her left eyebrow" or "he wore round glasses, not square" can correct a reconstruction that would otherwise look plausible but wrong.
Finally, scan or photograph the damaged original at the highest resolution you reasonably can. Whatever partial detail survives at the edge of the missing area — a sliver of an eye, the curve of a collar — gives an artist or an AI tool more to work from, and a low-resolution scan throws that detail away before you've even started.
- Other photos of the same person from a similar era
- Photos of close relatives if no other picture exists
- Family recollections of specific features (moles, glasses, hairstyles)
- The highest-resolution scan or photo of the damaged original you can manage
Manual Recreation: Working with a Retouching Artist
A professional photo restoration artist recreates a missing section the way a portrait painter would: studying the surviving image and any reference photos, then digitally painting in the missing area brushstroke by brushstroke, matching the grain, tone, and lighting direction of the original print. This is slow, deliberate work, and for a badly damaged portrait it can take anywhere from several days to a few weeks depending on how much is missing and how many rounds of revision you go through.
The upside is a human eye checking every decision against your references in real time — useful for extremely large missing areas, group portraits where several faces need rebuilding, or cases where family members have strong opinions about specific features. The tradeoff is cost: because it's closer to illustration than photo editing, manual recreation typically costs significantly more than routine restoration work, and pricing is usually quoted per photo after the artist has seen the damage.
AI-Assisted Recreation: What a Tool Like OldtoLife's Recreate Does
AI recreation models are trained on how faces, clothing, and portrait compositions typically look, so when you upload a photo with a torn-away or missing region, a tool like OldtoLife's Recreate tool infers plausible structure for that gap — the missing side of a face, a hairline, the continuation of a collar — based on what surrounds it, and returns a result in about ten seconds rather than days.
This works best when a solid portion of the face or subject survives intact; the AI is extending real context, not inventing a person from nothing. When the entire face is gone and there's no partial structure to build from, an AI reconstruction is still a plausible-looking face, but it's more of an estimate — which is exactly why the reference photos and family recollections from the earlier step matter even when you use an automated tool. Compare the output against what you gathered, not just against what looks technically clean.
It's also worth noting AI recreation and AI colorizing solve different problems: Recreate rebuilds missing structure, while a separate colorize pass adds color to a black-and-white image. If a portrait needs both heavy reconstruction and colorizing, it generally works better to recreate the missing detail first and colorize the completed result afterward, so the color pass has real structure to work with rather than a blank patch.
Common Mistakes That Make a Recreated Portrait Look Wrong
Even a technically well-executed recreation can look subtly wrong if a few basic things are ignored. The most common failure is skipping reference photos entirely and letting an artist or tool guess — the result can be smooth and well-lit but simply not resemble the actual person, which family members notice immediately even if they can't say exactly why.
Lighting and grain mismatches are the next giveaway: a recreated patch needs to follow the same shadow direction as the surviving part of the photo and retain some of the same film grain or texture, or it reads as an obvious digital patch rather than part of the original print. Over-smoothing is a related problem — a reconstructed area that's too clean next to an aged, grainy original looks pasted in rather than restored.
Before calling a recreation finished, zoom in and check period details against your references: hairstyles, collar shapes, and glasses frames all changed by decade, and a recreated feature from the wrong era stands out to anyone who remembers the original.
- Skipping reference photos and letting the guess stand uncorrected
- Mismatched lighting direction between the recreated area and the original
- Over-smoothing that makes the patch look plastic next to real film grain
- Recreated clothing, hair, or glasses from the wrong decade
- Not zooming in to check details before finalizing or printing
Step by step
- 1
Assess the damage patch by patch
Decide which areas just need cleanup (restoration) and which are physically missing or erased (recreation), since most damaged portraits need a mix of both.
- 2
Gather reference photos and family recollections
Find other photos of the same person from a similar period, and ask relatives about specific features so the reconstruction can be checked against real memory, not just guesswork.
- 3
Scan the original at the highest resolution available
Capture whatever partial detail survives at the edges of the damage, since a low-resolution scan discards information an artist or AI tool could otherwise use.
- 4
Choose your method
Pick manual retouching from a professional artist for complex or high-stakes portraits, or an AI tool like OldtoLife's Recreate for a fast first pass on a partially intact face.
- 5
Check the result against your references
Compare the recreated area to your gathered photos and family notes, and flag anything — a hairline, a feature, an expression — that doesn't match before sharing or printing the final image.