Restore Baby and Childhood Photos from the 80s and 90s
Turn faded, yellowed prints and blurry snapshots from your childhood into clear, natural-looking photos you can actually print and frame, right from your phone.
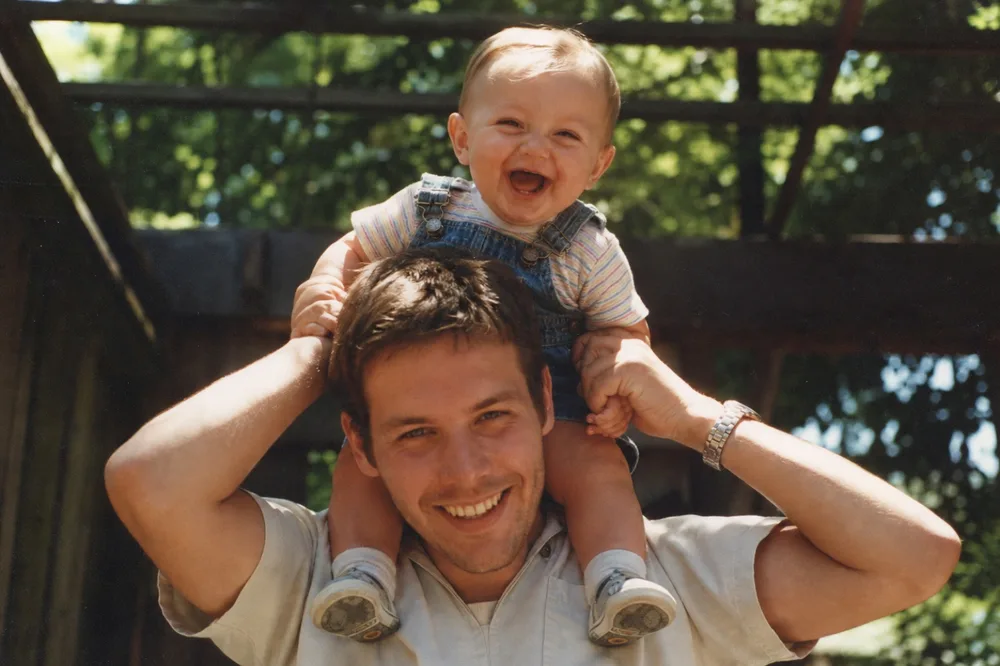
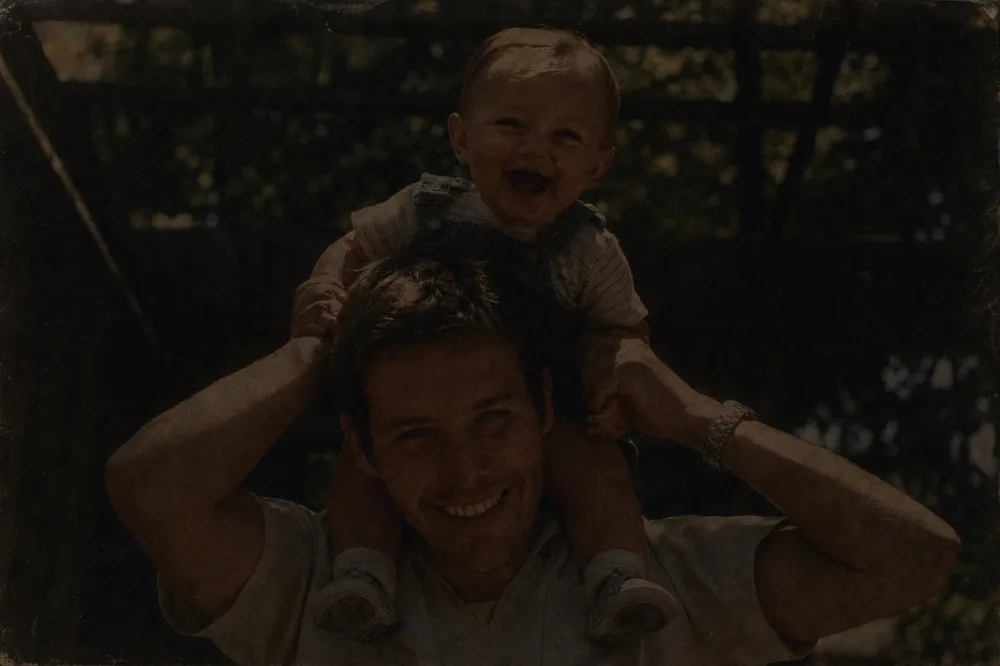
Drag to compare before & after
Restoring a baby or childhood photo from the 80s or 90s usually means correcting three things at once: a color cast from faded dye, blur from a moving toddler and a slow camera, and a dark or overexposed frame from an on-camera flash. These photos are rarely damaged the way a torn 1940s portrait is damaged — the print itself is usually intact — but decades of drugstore film chemistry and basic point-and-shoot cameras left their own kind of wear.
OldtoLife's Restore, Brighten, and Enhance tools were built for exactly this combination. Each one addresses a different part of the problem, so a hazy first-birthday photo or a too-dark hospital picture can go from barely recognizable to something worth printing and framing, in about ten seconds per photo.
Why Baby Photos From the 80s and 90s Fade and Blur
Most childhood photos from this period came from consumer film — Kodacolor or Fujicolor negatives — developed and printed at a local drugstore or one-hour photo lab. Color dyes in those prints fade unevenly: cyan fades first, so a photo that once looked balanced slowly shifts toward orange, pink, or a washed-out yellow. That's why a picture of a first birthday cake often looks like it was shot through a warm filter that was never actually there.
Blur is just as common, and it isn't really damage — it's how the photo was taken. Point-and-shoot cameras from that era had slow autofocus and needed a lot of light, so photographing a moving toddler, especially indoors, tended to produce a soft, slightly blurred face. Add a weak on-camera flash that only lit the first few feet of a room, and you get the familiar combination found in most family archives: a bright, flash-lit face against a dark background, with everything a little out of focus.
On top of the film chemistry and camera limitations, these photos usually show wear from handling. Baby pictures get passed around, tucked into wallets, taped into scrapbooks, and stuck behind sticky album pages that yellow over time and sometimes pull off part of the image when removed. The most common problems in this category:
- Orange or pink color cast from faded print dye
- Soft focus from a moving subject or slow shutter speed
- Dark backgrounds with an overexposed, flash-lit face
- Yellowed borders and creases from album storage
- Tape residue or sticky-page damage along the edges
- Low resolution from small prints enlarged or rescanned
Restore, Brighten, or Enhance: Matching the Tool to the Problem
OldtoLife has six tools, and three of them cover almost everything that goes wrong with a photo from this era. Restore is built for physical and chemical damage — the color cast, the creases, the yellowed edges, the tape marks from a scrapbook page. It treats the photo as a damaged original and repairs what the film and the decades did to it, without inventing detail that was never there.
Brighten solves a different problem: exposure. Many childhood photos from this period were taken indoors with a weak flash, so the subject is either too dark to make out or so overexposed that features wash out. Brighten rebalances the light across the frame so a baby's face that's currently a dark silhouette becomes visible, without blowing out the rest of the image.
Enhance is for focus and resolution. If the print itself is in decent shape but the photo was simply soft when it was taken — a common outcome when photographing a child who won't sit still — Enhance sharpens the face and recovers detail the original camera and lens couldn't capture. Most childhood photos have more than one of these problems at once; start with whichever issue is most distracting, then try a second tool on the result if the photo still needs it.
Which Childhood Photos Are Worth Restoring First
Not every snapshot needs the same care, but a few categories tend to matter most to families: the hospital or first-days-home photo, the first birthday cake picture, a first-day-of-school shot, and any photo where a grandparent or sibling who has since passed is holding the baby. These are usually single prints — there's no negative to reprint from, no backup on a hard drive, just the one photo that's sat in a box or album for thirty-plus years.
Class photos and school portraits from the same period are worth a second look too. They were printed in bulk on inexpensive paper stock, so they tend to fade and yellow faster than other family photos even though they were often taken more recently. If there's a name or date written on the back, that context is worth keeping alongside the restored image — it's often the only record of when the photo was actually taken.
What a Restored Baby Photo Actually Looks Like
The result isn't a redrawn or reimagined version of the photo — it's the same image with the fading, blur, or dark exposure corrected. A face that was a dark shape against a bright flash becomes visible. A washed-out orange print regains something closer to its original color balance. A soft, blurry edge around a toddler's face sharpens enough to see the expression clearly. The before-and-after slider in the app makes it easy to check the result against the original before deciding it's right.
Processing takes about 10 seconds per photo, so restoring a handful of prints from one photo album is quick to do in a single sitting. Every result saves at full resolution with a Premium subscription, which matters if the family plans to print it again or put it in a frame — a blurry 4x6 blown up for printing needs the extra resolution far more than a photo that will only ever be viewed on a phone screen.
Step by step
- 1
Gather the original prints
Pull the actual photo, not a photocopy or a photo of a photo, since the AI works best from the sharpest source available.
- 2
Import the photo into OldtoLife
Photograph the print or import an existing scan directly into the app.
- 3
Pick the tool that matches the damage
Choose Restore for fading, color cast, and creases; Brighten for a dark or backlit shot; or Enhance for a soft, blurry face.
- 4
Compare before and after
Slide between the original and the result to check that the restoration looks natural before saving it.
- 5
Save or share the result
Save the full-resolution photo to your camera roll or share it directly with family who'll want to see it.
Common questions
Can OldtoLife fix a childhood photo that's both faded and blurry?
Yes. Run Restore first to correct the color and any physical damage, then try Enhance on the result if the focus still needs sharpening.
Will the colors look accurate after restoring a faded 80s or 90s print?
Restore works from the color information still present in the print to rebuild a natural balance. It won't guess at colors that have completely disappeared, but most consumer prints from this era have enough left to recover.
Does it work on Polaroids and instant photos from that period?
Yes. Polaroids respond well to Restore and Brighten, since their most common issues — a yellow-green cast and soft contrast — are exactly what those tools are built to correct.
What if there's a crease or tear across the baby's face?
Restore is designed for exactly this kind of damage, filling in creases and tears while keeping the rest of the photo untouched. For larger missing areas, Recreate is the better tool.
Do I need to scan the photo first, or can I just take a picture of it with my phone?
You can photograph the print directly in the app. Shoot it flat, in even light, without flash glare across the surface, for the cleanest result.
Is there a limit to how many baby photos I can restore?
The free version has a daily limit. Premium removes it, which is useful when working through a full photo album in one sitting.
Still have a question? Email us
Tools & guides for this
Restore Old Photos with AI
Erase scratches, stains, creases, and tears from old prints. OldtoLife rebuilds the damaged areas of a photo so a worn picture looks whole again — in about ten seconds.
Enhance Photo Quality: Sharpen Blurry Faces & Boost Resolution
Turn soft, blurry, low-resolution photos into sharp, detailed images — Enhance recovers the fine detail old cameras and scans lost, without changing the photo's original color or character.
Brighten Old Photos: Fix Dark, Faded Exposure
Recover a photo that's too dark, too pale, or unevenly lit — OldtoLife balances exposure so faces and backgrounds both come through clearly, in about 10 seconds.
Restore Old Family Photos
The family photos in a shoebox are often the only images you have of the people who came before you. OldtoLife helps you repair and revive them before they fade any further.
Restore School and Graduation Photos
Class pictures, yearbook portraits, and graduation snapshots fade, blur, and crease faster than most keepsakes because they were printed cheaply and handled for decades. OldtoLife sharpens the faces, repairs the damage, and corrects the color so your classmates and that day come back into focus.
How to Fix Blurry Old Photos, Step by Step
Not all blur is the same, and not all blur can be fixed the same way — the trick is matching the fix to what actually went wrong with the photo.
Your memories deserve to be seen clearly
Download OldtoLife and restore your first photo in seconds. Every tool is free to try — no account needed.